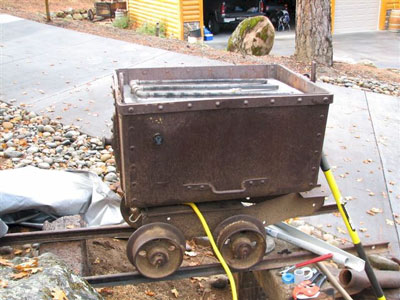
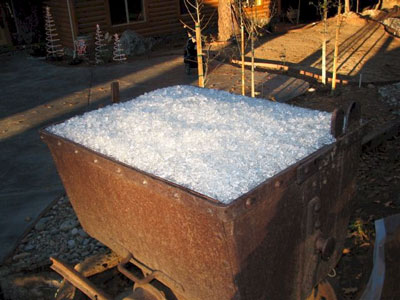
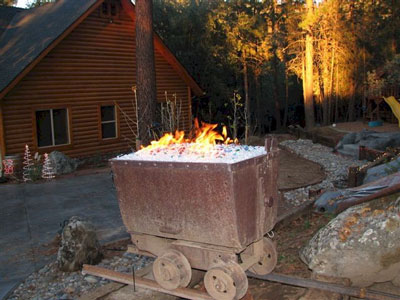
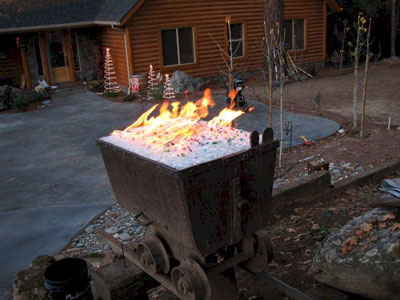
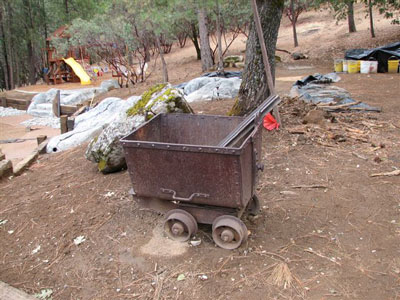
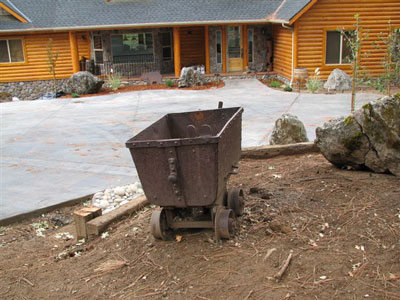
The fire pit below belongs to Mike DeVito in Northern California. When I saw his idea I was excited to help him create something new and wonderful. He took a very old mining cart in his front yard and we helped him convert it to a propane burning fire pit! Turned out pretty cool! Next he is getting a fire pit cover made to cover it from debris and who else knows what.
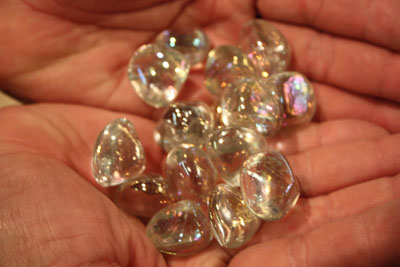
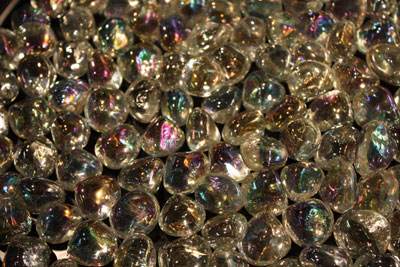
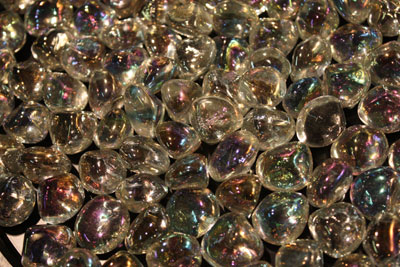
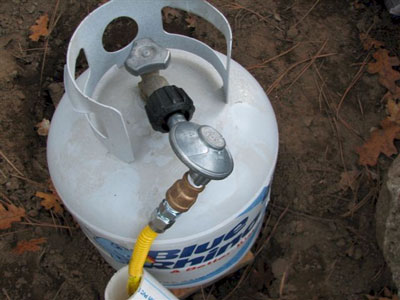
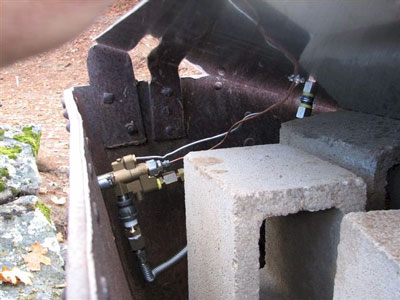
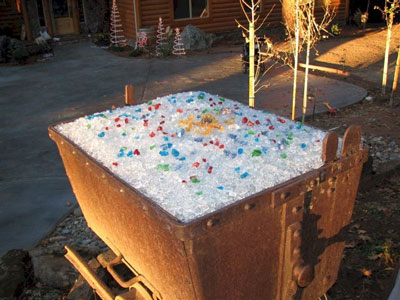
We use a FPPK (fire pit propane kit) with valves, thermocouple, pilot light and air mixer. The glass that was use is:
Here you see the controls, air mixer and thermocouple and pilot light lines under the base plate
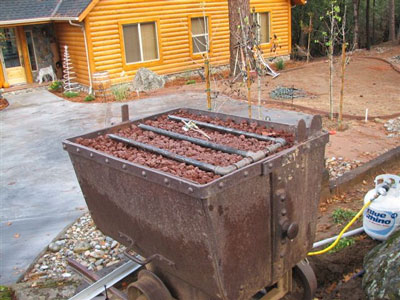
You can use a larger (3/4", 1" lava) as a base under our 1/4" crushed lava as this will save you a few dollars.
Again here are the first pictures we saw of the mining cart. Great Idea!


Las Vegas Yard Crashers!
This will air in April of 2010!
Here is a preview

This is what was done on the first day. I showed up on the beginning of the second and the final day. It's amazing what can take place in just 12 hours!

Above the pavers were installed the day before.
Below is the patio with the outdoor kitchen set aside for now.


Above is where the outdoor kitchen will reside later.
Even the palm trees were brought in! There was nothing on the site when it started the day before.

Below Ahmed was leveling the ground around the fire pit area. Ahmed worked all day, much harder than anyone else! I was very impressed how hard he actually works to get the show done.


Below is where the propane fire pit will sit. The controller will be mounted to the side of the concrete base after the paper tubes are cut away.


Above and below you can see the inside of the planter is coated to prevent water from leaching out.

Above you can see on the ground that we brought the fire bowl in. Just so you know it was about 300 lbs!


Above and below you can see outdoor kitchen. The trough coming out is actually water fall spilling into a dry creek bed below. The water feature was covered with a glass top making it a dining area as well. On the inner wedges they wrapped rope lights to accent the water and rocks under the glass top.


Above and below you can see the sand was installed as a base for the artificial grass to come.


Above they are compacting the sand for the grass to be installed.
Below Ahmed is finishing the dry creek bed.

Below the grass is installed.

Below the dry creek bed is finished and the grass is now installed in the back are as well.


Above is our fire bowl on propane. We used Starfire Base Glass with Ice Ice Ice Topper and Diamonds on top. We brought out several colors of Diamonds for the customer to pick and choose but she liked them all so much, she installed every last one!

Below you can see after everything was cleaned up how spectacular it turned out!


We are to feature several more episodes with Yard Crashers and we will be showing several more of our new product lines on their shows. We still have several shows we need to post pictures of what we did. Please come back from time to time to see our latest updates.
I thank Ahmed and the producers of the Yard Crashers for giving us the opportunity to work with them.
Thanks to Tiffany, Krystal and Holly at Idea Factory!
Idea Factory produces Yard Crashers for the DIY Network
"Click HERE for the DIY Network/ Yard Crashers Site!"
Do it yourself fireplace remodel made easy, or at least it seems that way.
First, the tile that was installed is not rated for fire. This tile would of popped off as soon as the fire was turned on. So do a little research before you begin. We can help in many ways, just call and ask.

It may have of seemed to be a good idea at the time, but it wasn't!

When redesigning a fireplace we suggest card board mache'. A card board board mock up so you can see a basic preview of your project.


Below you can see the bottom, top and mantle in card board.


Now the rip and tear process begins!

Below we installed the extra electrical for the components and the TV. The components will be installed on the right side out of view with a black glass door. This will be installed later.

Below the framing begins.


Below we now added the Durock at the fireplace opening. This is key to the whole project. Math is very important when doing these layouts!


Below you can see the slate is being added.


Above and below the fireplace is 90% finished. The mantle needs to be installed and the door on the right to conceal the components needs to be installed as well. The inside of the fireplace will have 3 pieces of black galaxy granite installed. We will post these pictures of the fireplace when it is completely finished as well.

Now for the glass installation. We started with a satin black paint on the back walls, until we install the granite. Then we bulked up the base with 2" of white sand as this will save you a bunch of money! We used sand because we were pouring Starfire Base Glass in the fireplace. If we were to use a darker color of glass we would of used our crushed lava rock as a filler. When using sand, always make sure the burner is on top of the sand.

Test the burner/ location making sure the flames don't hit the walls.


Then pour the glass!


We added a few pink diamonds and then later added Ice Ice Ice Topper and Clear Diamonds. These products because of the way they are made appear to be melting on the inside.


The sealer that was used was a stone enhancer, not just a regular cheap sealer. When using rock you always want to see the beauty of the stone you are using.


As you can see the mantle is still missing. We have a few more details to still do and as soon as we have time to post the pictures, they will be here.
We encourage imagination to all of our customers and we support you and your projects. Regardless how simple or how creative. This is one of the elements that spawned our success and continues to do so.
The fire place below is very unique because it is back lit Onyx. They used Clear Diamonds and Amber Diamonds for accents.


The next fire pit below has one of our FPPK's installed. We didn't supply the star burner bur we did get it to burn correctly with a Ford Blue Base Glass. Then it was Topped with Clear and Blue Diamonds. We will explain as we move on.

Below you can see the gas shut off on the left and our FPPK box on the lower right.


Below you now have fire! It was a bit windy but you get the idea.