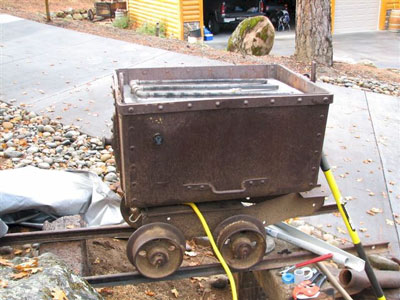
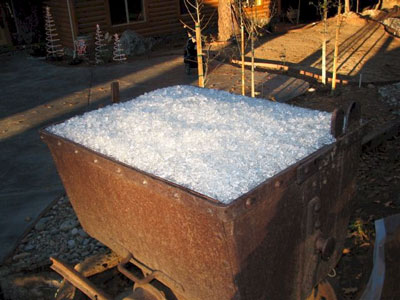
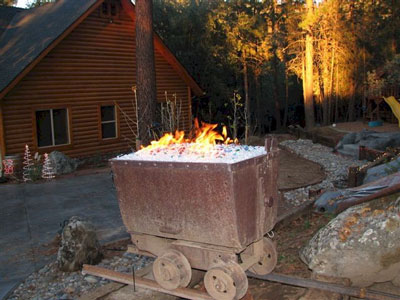
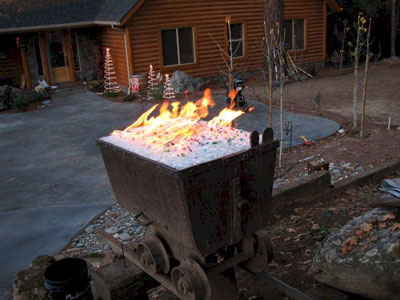
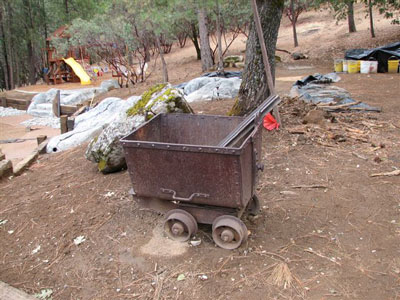
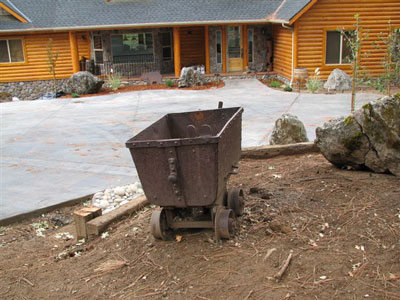
The fire pit below belongs to Mike DeVito in Northern California. When I saw his idea I was excited to help him create something new and wonderful. He took a very old mining cart in his front yard and we helped him convert it to a propane burning fire pit! Turned out pretty cool! Next he is getting a fire pit cover made to cover it from debris and who else knows what.
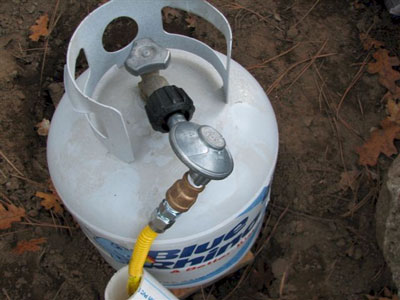
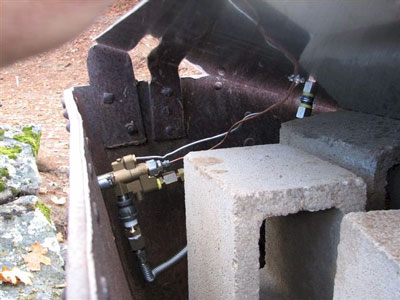
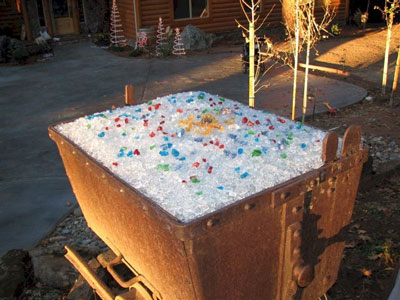
We use a FPPK (fire pit propane kit) with valves, thermocouple, pilot light and air mixer. The glass that was use is:
Here you see the controls, air mixer and thermocouple and pilot light lines under the base plate
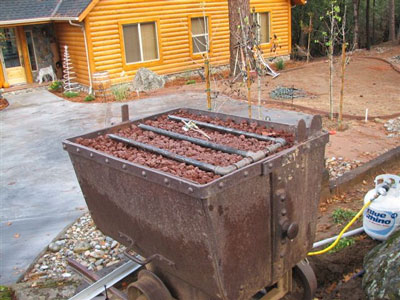
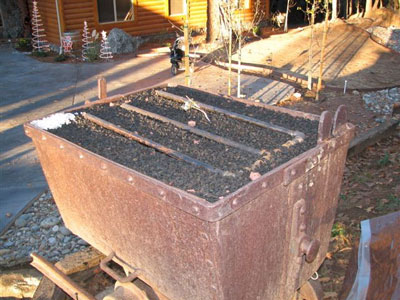
You can use a larger (3/4", 1" lava) as a base under our 1/4" crushed lava as this will save you a few dollars.
Again here are the first pictures we saw of the mining cart. Great Idea!
Las Vegas Yard Crashers!
This will air in April of 2010!
Here is a preview

This is what was done on the first day. I showed up on the beginning of the second and the final day. It's amazing what can take place in just 12 hours!

Above the pavers were installed the day before.
Below is the patio with the outdoor kitchen set aside for now.


Above is where the outdoor kitchen will reside later.
Even the palm trees were brought in! There was nothing on the site when it started the day before.

Below Ahmed was leveling the ground around the fire pit area. Ahmed worked all day, much harder than anyone else! I was very impressed how hard he actually works to get the show done.


Below is where the propane fire pit will sit. The controller will be mounted to the side of the concrete base after the paper tubes are cut away.


Above and below you can see the inside of the planter is coated to prevent water from leaching out.

Above you can see on the ground that we brought the fire bowl in. Just so you know it was about 300 lbs!


Above and below you can see outdoor kitchen. The trough coming out is actually water fall spilling into a dry creek bed below. The water feature was covered with a glass top making it a dining area as well. On the inner wedges they wrapped rope lights to accent the water and rocks under the glass top.


Above and below you can see the sand was installed as a base for the artificial grass to come.


Above they are compacting the sand for the grass to be installed.
Below Ahmed is finishing the dry creek bed.

Below the grass is installed.

Below the dry creek bed is finished and the grass is now installed in the back are as well.


Above is our fire bowl on propane. We used Starfire Base Glass with Ice Ice Ice Topper and Diamonds on top. We brought out several colors of Diamonds for the customer to pick and choose but she liked them all so much, she installed every last one!

Below you can see after everything was cleaned up how spectacular it turned out!


We are to feature several more episodes with Yard Crashers and we will be showing several more of our new product lines on their shows. We still have several shows we need to post pictures of what we did. Please come back from time to time to see our latest updates.
I thank Ahmed and the producers of the Yard Crashers for giving us the opportunity to work with them.
Thanks to Tiffany, Krystal and Holly at the Big Table Media!
Big Table Media produces Yard Crashers for the DIY Network
"Click HERE for the DIY Network/ Yard Crashers Site!"
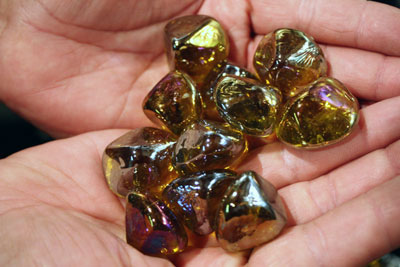
Below is a collection we took pictures for our customer to decide on which base to use under the Amber Diamonds.
Amber Diamonds alone

Amber Diamonds on Black Base Glass

Amber Diamonds on Starfire Base Glass

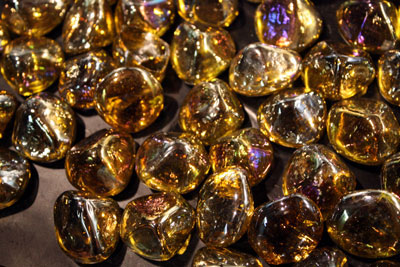
Amber Diamonds on New Yellow Base Glass

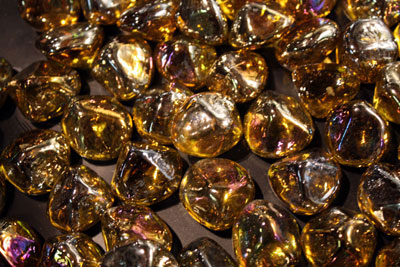
Amber Diamonds on Bronze Base Glass

The same product can be displayed thousands of ways. What do you want to see? Our diamonds are made with a convex base so when you look at the Diamonds in the fire they seem to be melting on the inside, like looking into a spoon. We cause it to reflect backwards. Visit out "Diamonds Page" to see many more colors!
The fire pit below is going to be installed in Sacramento on 11 14 09 for the Yard Crashers/ DIY/ HGTV show. After it is and has been installed we will post pictures on the Yard Crashers page. In the mean time here is the how to and why. We can build any size, shape, design feature you desire. We build to your imagination.
Below is the catch basin to hold the water for the feature

Above you see the auto fill?
Below the water pump is now install below.

Below the top pan is in place for testing with the fire and water bowls in place


Below the stainless steel ring is installed.

Below the glass (Bronze Base Glass) has been installed and the lights turned on.
 .
.
Below you can see the pump has been turned on.

and now the fire.

We placed a card board template to replicate the table top to conceal the lights as well.

Now we add color to the water!


Here is the feature exposed with the blue water. You can change the water to any color you like.


This feature is only 6 1/2" tall. You can mount this under the table top and keep it only an inch or so above the surface of the table top.

So let's change it to red water and add Starfire Base Glass.


Remember, we build to your imagination!

The finished pictures will be posted on the Yard Crashers page when this project is installed after 11 14 09!
"CLICK HERE to see the "Yard Crashers" Sacramento show!" with this feature installed.
The fireplace below has a steel pan underneath to conceal the 12 volt remote control. We used a Clear Base Glass and topped it with a Starfire Base Glass and then added Amber Diamonds on the surface.


You can see the front plate that ws painted to match which is removable if and when necessary to change the batteries. The legs were 4 1/2" and the pan was 2" tall. The removable front metal curtain was 6 1/2" tall.


The fireplace pictures below will show how simple and easy it actually is to install.
Here are a few comments from J.D.
Harriman John. Harriman@
dlapiper.com
Subject: More proof of how easy it is to do with Moderustic providing the materials!
We are so happy with our fireglass fireplaces (we have 3!). It has literally changed our lives in that we can use our fireplaces anytime we want with no worry about
cleaning ashes later on. Even better, the look is so superior to fake logs. All of our friends have been wowed by the look. We always send them your way.
Best regards,
J. D. Harriman
Here we go:

Above you can see how nice it WAS! YUK!
Below they painted, we always recommend painting the lines first and then painting each brick separately. Using this technique you can eliminate spots.

Install the burner. We usually recommend curling the flex line from underneath, but this works as well if your flex line is long enough. The reason for the flex line: it allows you to move the burner forward to prevent the flames from hitting the back wall.

Below the lava has been poured and test the flame pattern.

Pour the glass from the front going to the back. You can use a cup or pour from the bucket.

Turn it on and you're done!

The glass that was used is:
Starfire Base, Glass
1 lb of Gold Base Glass,
Amber Diamonds,
Ice Ice Ice Toppers for one simple but nice fireplace!

The fire place below is very unique because it is back lit Onyx. They used Clear Diamonds and Amber Diamonds for accents.

The fire pit below was designed and built by Tamara Lyons and her wonderful family! Junior help most. The glass that was used is:
Bronze Rust Copper Base Glass,
E.D. Diamonds, Red and Orange,
Amber Diamonds,
Orange R140 Topper, this particular color is one of our chameleons. It turns a bright cherry red when heated and cools back to orange when cooled!
The fire pit had three sets of burners. One in the center and one on each outer edge. This way you can control how large, how much and where you can have fire when you want it.

This is how it started

Pea gravel base

Measure once, cut twice.

Ohhh, what color?? There are sooo many. What to do????

So we sent a make up of what colors they liked. We can do this for you as well. Just tell us what colors you want and we will mix a batch and send you the pictures!


You should of seen the rest of the back yard! Who needs a house! I would live in the back.

The outdoor fireplace pictures below are in Sacramento, California (for Nancy and Derek Long). This was built by Jake Moss and Jim Corbett who are constantly features on DIY's Yard Crashers! We have worked with them several times and now we continue to help create some pretty cool features together. Here we go:
The glass that was installed is: